Discovered a Hole in Your Favorite Garment? Don’t Worry!
Finding a tiny hole in a beloved piece of clothing can be frustrating—but there’s no need to panic or break out a sewing kit. You don’t have to be a sewing pro to fix it! This simple, no-sew method is perfect for small holes and leaves no visible stitching. With a little practice, you can patch up those pesky pinholes in minutes.
What Causes These Annoying Holes?
While moths are often blamed, they’re not the only cause. Everyday activities and even your laundry routine can damage fabrics. Here are some common culprits:
- Moths and fabric pests
- Zippers, belts, and bra clasps rubbing against fabric
- Unzipped or overloaded garments in the washing machine
- Snags on rough surfaces
- Chlorine bleach, which can weaken fibers over time
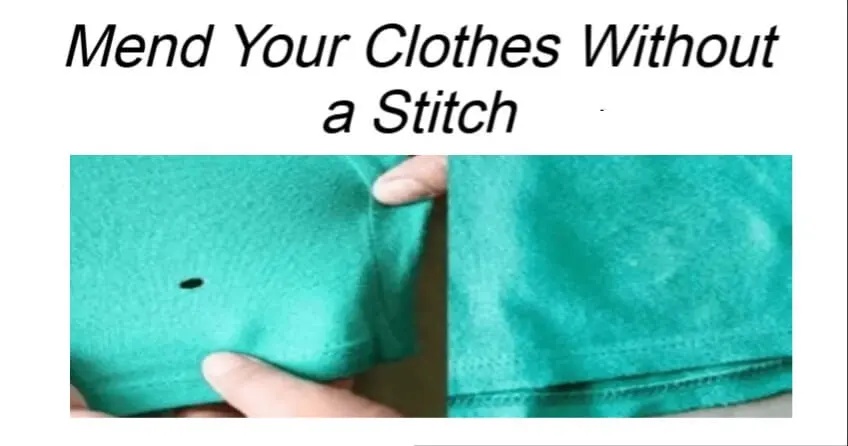
No-Sew Hole Fixing Guide
What You’ll Need:
- Iron
- Fusible bonding web (like Stitch Witchery)
- Wax paper
Step-by-Step:
- Turn the garment inside out and lay it flat.
- Cut a piece of fusible bonding web just slightly larger than the hole.
- Gently bring the hole’s edges together.
- Place the bonding web over the area, then cover it with wax paper.
- Iron over it using the “wool” setting, applying even pressure.
- Let it cool. Repeat if necessary.
That’s it! The hole disappears—no stitching required.
Tips to Prevent Future Holes
- Zip up garments before washing
- Use bra wash bags or fasten clasps before laundering
- Turn delicate fabrics inside out
- Avoid bleach—use vinegar or baking soda instead
- Deter moths with lavender sachets or mint oil
- Be cautious around rough or abrasive surfaces
With this easy method and a few preventative steps, your favorite clothes can stay hole-free and looking great for longer!